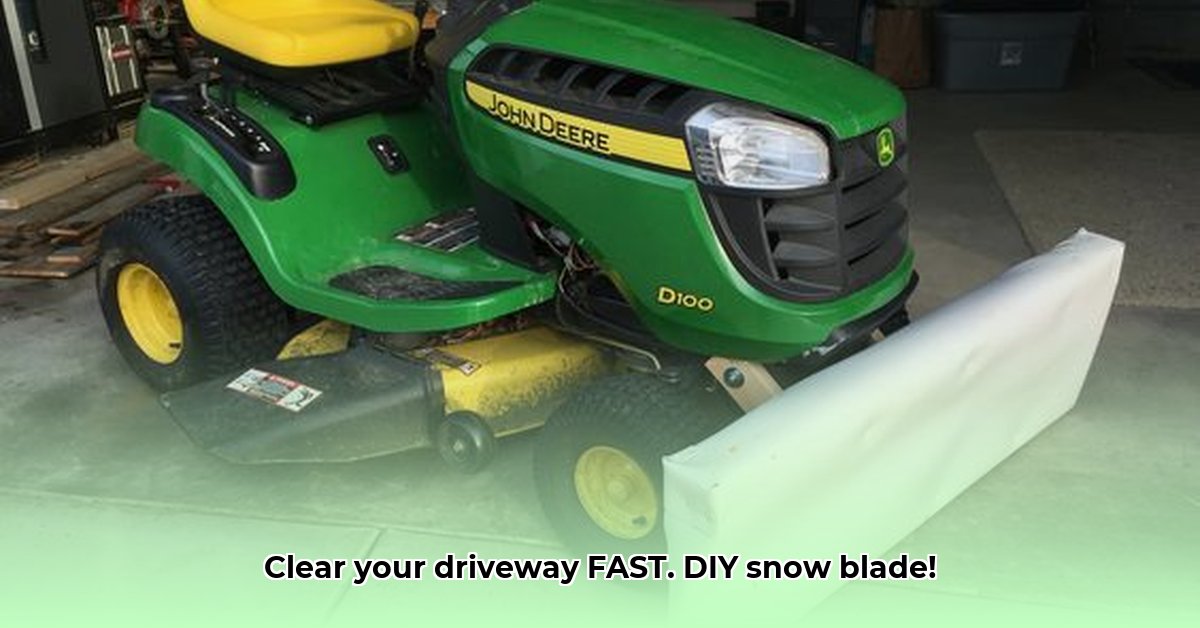
Tired of expensive snow removal services or bulky store-bought snow blowers? Build your own snow blade for your lawn tractor, saving money and boosting your DIY skills. This comprehensive guide provides step-by-step instructions, safety tips, and troubleshooting advice – ensuring a successful and safe winter project. However, this project requires some DIY experience and comfort with power tools and metalworking. If you're unsure about any step, consult with a professional. For more tractor-based snow removal options, check out this helpful resource.
Safety First: Prioritizing Your Well-being
Safety is paramount when working with power tools and sharp metal. Consider your safety gear as your armor; it's essential for protection:
- Eye Protection: Always wear safety glasses; flying metal sparks can cause serious eye injuries.
- Hand Protection: Heavy-duty work gloves protect your hands from cuts and scrapes.
- Foot Protection: Steel-toed boots safeguard your feet from dropped objects.
- Respiratory Protection: When welding, a respirator is crucial to protect your lungs from harmful fumes. Don't underestimate this risk.
- Fire Safety: Keep a charged fire extinguisher nearby, particularly while welding. A small fire can escalate quickly.
- Hearing Protection: Loud power tools can damage hearing; earmuffs or earplugs are recommended.
Materials List: Gathering Your Supplies
Smart sourcing can save you money and reduce waste. Repurposing scrap metal is environmentally friendly and cost-effective. Here's a detailed list:
| Material | Quantity | Sourcing Tips | Notes |
|---|---|---|---|
| Steel Sheet Metal | 1 sheet (or more) | Salvage yards, scrap metal dealers, or local metalworkers; at least 1/8" thick | Consider thickness based on anticipated snow conditions and tractor power. |
| Angle Iron | As needed | Salvage yards; choose a gauge suitable for the blade's size and weight. | Ensure sufficient strength to support the blade under stress. |
| Bolts & Nuts | Variety of sizes | Hardware stores; check your garage for existing supplies. | Use galvanized bolts for weather resistance. |
| Paint (optional) | 1 can | Hardware stores; choose outdoor-rated paint designed for metal. | Protects against rust and enhances visibility. |
| Welding Equipment | As needed | Rent or borrow if you lack personal equipment. | Consider professional welding assistance if you're inexperienced. |
| Cutting & Grinding Tools | As Needed | Hardware stores or tool rental. | Ensure tools are in good working order and you know how to use them safely. |
Step-by-Step Instructions: Building Your Snow Blade
This guide outlines a simple design; adapt it to your specific tractor and needs. Remember, precise measurements are key for a well-functioning blade.
Design and Template: Sketch your blade design. Simplicity is key. Create a cardboard template to ensure accurate metal cutting.
Cut the Steel: Use a metal-cutting saw or plasma cutter to cut the steel sheet according to your template. Accuracy is crucial for a proper fit. Wear appropriate PPE.
Frame Construction: Weld or securely bolt the angle iron to create a robust frame around the steel blade. Ensure a strong and secure structure. If welding, follow all safety procedures meticulously.
Blade Attachment: Attach the steel blade securely to the frame using heavy-duty bolts and nuts. Reinforce as necessary for strength and durability.
Mount Fabrication: Design a secure mount to attach the blade to your lawn tractor’s hitch. Consult your tractor's manual for specifications. Welding may be required; prioritize safety!
Painting (Optional): Apply rust-resistant paint to protect your blade and improve its appearance. Allow ample drying time before use.
Testing and Refinement: Test your blade in a safe, controlled environment before tackling significant snowfall to identify and address any potential issues.
Troubleshooting Common Problems
Even experienced DIYers encounter challenges. Here’s how to tackle some common issues:
- Blade Doesn't Engage: Check bolt tightness, mount alignment, and ensure the blade angle is appropriate for snow removal.
- Blade Bending: Use thicker steel or reinforce the frame to withstand heavier snow loads.
- Tractor Stalling: The blade might be too large or the snow too dense. Consider downsizing the blade or using a more powerful tractor.
Conclusion: Responsible DIY Snow Removal
Building your own snow blade saves money and allows you to customize your snow removal solution. However, remember the inherent risks. Prioritize safety throughout the entire process—from material selection to operation—for a successful and safe project. Responsible material sourcing and disposal are crucial aspects of this project's environmental impact.
Disclaimer: Liability and Responsibility
This instructional guide is provided for informational purposes only. The author and publisher assume no liability for any injuries, damages, or accidents resulting from the construction or use of this DIY snow blade. Proceed at your own risk. Always prioritize safety and adhere to all relevant safety regulations.